
How to make a Hooded Blanket Poncho.
- pakawownz
- Jan 28
- 4 min read
Sewing a blanket poncho can be great fun, and you can create a garment that is both warm stylish and functional.
Just follow the Step by step instructions below to sew your very own.
You will need a large blanket,
and lining fabric of the same amount as blanket size.

Remember finished size of your poncho will depend on the size of your blanket, and how much you use to make your hood.
To check how long your blanket poncho will hang pinch and lift from the center point of your blanket and hold up to your neck at shoulder, this will give you a good idea of the length your finished poncho would be off your blanket size and will give you an idea of if you need to reduce the size of your blanket to achieve your desired fit.
Making a blanket poncho is easy, just follow the simple steps below.
Step #1 - Cutting the blanket

First, we need to cut a strip off the side of the blanket to use to create the hood.
I like to take a strip from the width of my blanket rather than the length, as you usually want your finished poncho a bit shorter on the sides to allow ease of use of your arms while wearing it.
To do this fold your blanket in half with the fold where your neck and shoulders will go on poncho.
Measure half your hood width plus seam allowance in from the edge and cut this strip off.
Cut your strip into four even lengths and sew two together to create pieces the right size for the two pieces of fabric for the sides of the hood.
Cut the two pieces of your hood to shape as shown below.
If you are lining your poncho cut two pieces the same of lining as well.

Step #2 - Cutting the neck hole
Now we need to cut the neck hole on your poncho.
With your main blanket again folded in half, mark the middle point between the two sides on the fold. This will be the center point of your neck hole.
Now is the time to consider of you want your poncho shorter in the front, or even length both front and back.
We are going for even length so cut our neck hole in the exact middle of our blanket.
You're going to cut a straight cut 4-6 inches long
(about 2 or 3 inches on either side of that center point)
then carefully round the front side only of the neck hole.
Then you will need to cut down about 3 inches from the middle, as shown below.

Step # 3. Sew the hood
Take your two hood pieces, place right side together and sew along the curved edge along the back of the hood to bring the two pieces of the hood outer together.
Do this again with lining.
Now you will have a hood made of outer and a hood made of lining.
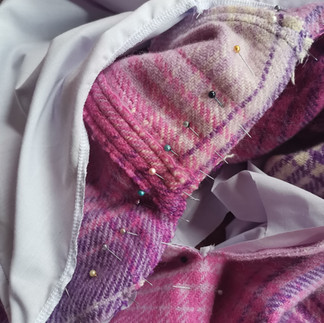
Put these together so that they are together on the right side of the fabrics. Sew along the straight around the face edge to join lining hood to outer hood.
Turn in right way to reveal hood, which is now completed but still open at neck (see photo below).

Step #4 - Line your blanket.

Lay your blanket out flat and lay your lining, the same size over top, good sides together.
Pin together at edges.
Sew right around the edge of your blanket joining blanket and lining together.
Turn the right way out though neck hole.
If you want to you can run a seam around the edge again for decoration or add trim.
Step #5 - Attaching the hood.


First you need to pin and sew the blanket side of the neck of the hood to the blanket side of the neck of the poncho (see middle photo above).
Now pin and sew together lining of hood to lining of the poncho (see photo above right).
Step #6 - Finishing touches.
To finish up #1. add trim along neck edge at front, I like this bias binding for the edge, but you can finish the edge just by sewing together if you prefer a plainer look, or add a fancier trim.
Next sew the button holes and sew on buttons.
Lastly if you want chords on your hood attach these.
I like to sew these on by hand at the end. Simply attach at the join of the hood on each side.
And just like that your Hooded Blanket Poncho is complete.


Until next time...
Thank you for checking out my How to make a Hooded Blanket Poncho Blog.
I hope you have found it helpful.
Follow us on Facebook or Instagram for more updates on all our projects and creations.
https:/www.instagram.com/paka_wow


Comments